Sunday, May 22, 2011

A "Hidden" Picnik Effect: Curves

A few weeks ago, I was experimenting with some of the effects on Picnik.  For whatever reason, none of the effects I typically use on photos satisfied me, so I started clicking on tabs on the website that I typically ignore.  I happened to click on the "advanced" tab, where clone, levels, curves, burning, etc. are located.  I almost never use any of these effects, so I wasn't expecting any of them to solve my problem.  However, I was pleasantly surprised when using Curves.  I had never noticed that there were presets that you could apply to your photo like Dramatic Sepia, three cross process options, Velvia, Ambrotype, and Polaroid (to name a few).  All of these are good options when you feel that the usual effects aren't doing anything for your photo.  You also have the option to fade these effects (to lessen their impact) or to selectively use the effect.

Here are a few examples of how I have used Curves on my photos.  You can see that there are varying degrees of subtlety that this effect can offer.

I believe I used either Velvia or Reala 400 for this photo.  Both effects provide more vibrant color and contrast to the photo.

I used Cross Process Red (faded) to add a little more of a red tone to this photo.

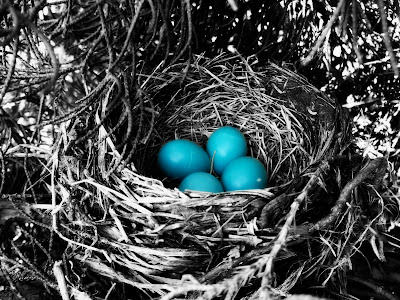
Here's a good example of a selective use of Curves.  I applied Dramatic Sepia before using the paintbrush to bring out the color in the robin eggs.
This was another example of a photo where I used Cross Process Red.  I faded the effect about 50% to keep the photo from having too much of a red tint.

TIP:  Remember that the "Fade" bar is your friend!  Almost any effect on Picnik can look over-the-top and ridiculous if you choose not to water it down a tad.


Also, I wanted to take a couple screenshots in case there is any confusion about a couple features that I keep mentioning.

You want to go to the create tab, and then click the Advanced sub-tab to get to Curves.

Here are all of the effects in the Advanced tab.  I may talk about some of the others later on.

You can use the presets menu to choose different effects within Curves.  You can select a specific color channel to apply the effect to (red, blue, green, or all three colors at once).  You can also click on the line in the middle graph to play with color on your own and create a unique color effect.  I personally do not use the Color Override bar, but you can experiment with that and see if you like the results.  The Fade bar I keep talking about is immediately underneath that.  Finally, he little paintbrush icon will allow you to selectively use the effect on your photo.

One other important thing I forgot to mention is that Curves is a Picnik Premium feature.  However, Picnik premium accounts are very reasonably priced, and more than one person can benefit from it.  My mom has a Picnik Premium account, but she allows my sister and me to log on to her account so we can access the full site.  If you're not sure that Picnik Premium is for you, you can see go on the website and play with the premium effects.  You won't be able to click "apply," but you can get an idea of whether or not it's worth the money to upgrade your account.

Friday, May 13, 2011

Developing Your Own Style

I'm going to try make this post short and to the point.  Basically, the title says it all: try to develop your own  unique style of taking and editing photos.  It's always a good idea to take pointers from others, but there's no enjoyment in mimicking someone else's work.  It's very likely that your style will come of its own accord as you experiment and improve your skills.  The best way hold yourself back is by trying too hard to replicate someone else's technique!

To illustrate what I am talking about when I say "style," I will post links below to three Flickr photostreams rather than trying to put the differences into words. One photostream is mine, one is my sister's, and one is my mother's.  If you take a look through some of these pictures, you will see that,  despite the fact that we are blood relatives, our photos look quite different.

My Photostream

My Sister's Photostream

My Mother's Photostream

There really isn't much more I can say to add to this topic.  The message is simple: Do your own thing!

Also, I would highly recommend checking out my mother and sister's photos.  My mother only really took up photography a year or two ago and has no training whatsoever.  My sister is only 14, and she's already taking photos that are 1000 times better than what I took at that age.  They both keep me on my toes and make me want to continue to improve.  I want to say that they are my competition, but inspiration is probably a better word to use.

Saturday, May 7, 2011

The Frustrations of Night Photography

Just to change things up a bit, I thought I would talk about an aspect of photography that I am nowhere near mastering.  Because this blog is primarily intended for other photography hacks like me, who are still learning techniques and are using cheaper equipment, I decided to touch on a topic that frustrates me and others like me.  I generally believe that you can still take great pictures with a cheap, regular digital camera.  However, when it comes to special lighting situations, like night shots, I have to take that statement back to a certain degree.  The fact of the matter is, even if you camera has a night setting and you use a tripod, you will still struggle with night photography without a nicer camera.

I don't attempt much night photography, and when I do, my results are not consistent.  I have used many different settings, and none of them consistently yield good results.  I don't own a tripod (I really need to get on that), but I have used flat, stable surfaces to take night shots, and it still isn't a guarantee.  I tried to do some night photography this winter, and out of dozens of shots, I only got a couple worth keeping (see below).


My main problem is blurriness, and I have to resort to editing to fix the photos as much as I can. Stability is improved with a tripod or hard surface, but even then the picture often doesn't come out how I want.  If anyone out there has good advice for getting better pictures with TYPICAL digital camera at night, I would love to hear it.  The reason I use the word "typical" is because suggestions for a fancy camera aren't going to help me or anyone else who has no plans to upgrade anytime soon.  If you have any advice to offer, you can go ahead and leave a comment to this post. If it is good advice, I may mention your suggestions in a later post for those that might have missed them in the comments.  Remember:  You don't need an account to comment on my blog.  Anyone can comment!

Monday, May 2, 2011

When to Take Outdoor Photos

For those of you who enjoy outdoor photography, whether it be nature photography or other subjects that are outdoors, you may have noticed that the time of day you choose to take pictures can have quite an impact on the final result.  It's possible to take good pictures at any time of day and in any weather, BUT I feel that the lighting at certain times is superior to others.

To put it simply:

Sunny sky > Overcast sky

Mornings/Evenings > Middle of the day

In my personal experience, I have found that it's much harder to get the photo I want if the sky is dark, gloomy, and overcast.  The lighting tends to be dull, and even with editing you can't easily fake the shadows that a sunny sky would have created.  When at least some sun is shining, the colors appear more vibrant, interesting shadows are created, and the overall product is much more interesting.  Also, morning and evenings have always produced more impressive results for me.  The middle of the afternoon is okay, but once again you lose shadows when the sun is directly overhead.  In addition, the mid-day sun tends to be harsh and washes out colors rather than enhance them.  If I take photos in the middle of the day, I usually try to find areas where some shadows are created by trees or or buildings.  It seems to lessen the impact of the sun and soften the light.

Most of the photography I do is either nature or still-life, but I think that the same idea would apply to photographing people.  I would expect that when taking outdoor photos of people, that they would tend to look better in morning or evening light on a sunnier day.  Clouds or overly bright light would wash out a skin tone the same way that it would wash out the color of a flower.

As an example, here are some photos taken at different times of the day and in different lightning situations.

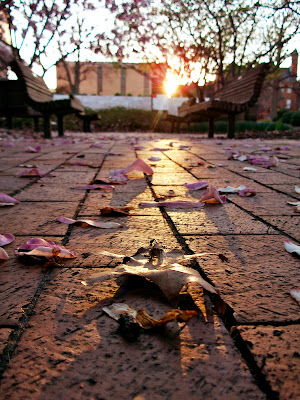
This was taken near sunset.  As you can see, the photo would not be the same if taken in mid-day light rather than the softer, more yellow evening light tone.

This photo would have been pretty lame without the evening light.  None of the shadows that make this shot interesting would have existed.

This shot was taken in the morning.  However, you can tell that it is later morning, and the light is beginning to wash out the colors a bit.  It's still not a bad shot, but it may have been more interesting about an hour earlier.

Here is an example of how you can find sheltered, shadowed areas to take pictures on a bright sunny day.  I actually took this in the early afternoon, but there is no direct sunlight in this area.

This was taken on a mostly overcast day.  It's a good photo, but I can't help but think that it would have taken less editing if it had been taken on a brighter day.  It took some work to get the colors to really pop the way I wanted.

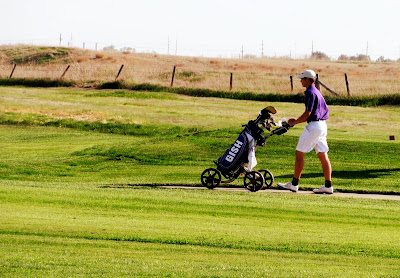
Here's a perfect example of what you get when you take a picture at noon, in direct sunlight, in the middle of the summer.  Not bad, but just a little harsh.
As I said before, good shots can be taken any time of the day, but I think you can increase your chances of a worthwhile shot if you stick to days with sun and go out to take photos in the morning and evening.

Side Note:  I was reading a book on digital photography awhile after posting this, and there was an interesting section on the time of year that is best to take photos.  I have to say that I agree with the author:  Winter > Summer

In my experience, for some of the same reasons that I mentioned about shooting in the middle of the day, summer lighting is not always the best.  The light is harsh and there's often an ugly haze in the air.  Something about winter light is excellent for taking outdoor photos.  I can't remember having any issues with winter photos at any time of the day.  Anyway, that was just something I wanted to tack onto the end of this post for those that are interested.