I can't tell you how many times I have flipped through photos on Facebook, Flickr, or an email and been annoyed by the sheer volume of photos. It's one thing if you have 200 photos that are equally fascinating and totally different from one another, but that's rarely the case. There is nothing more boring than looking at a Facebook photo album that has 50 photos in a row that look almost exactly the same. As dull as albums like this are, they are shockingly common on the web, which is why I'm dedicating a post to this topic.
The bottom line is: KNOW WHEN TO DELETE. If you take 10 photos of the same thing, even if they are all good, you either need to:
a) Pick a couple favorites and delete the rest. It will save you computer memory space.
OR
b) If you really can't let go of the photos forever, pick a couple favorites to upload and leave the rest on your computer.
I'm guilty of doing this myself. There have been times when I've uploaded similar photos and created some redundancy on my Facebook or Flickr accounts. However, I periodically go back and weed the not-so-spectacular photos from both my online albums and iPhoto on my computer. If you go back later you often find yourself much less attached to photos you couldn't let go of weeks or months ago.
As an example, I will use some pictures that I took yesterday to demonstrate how to choose. Yesterday afternoon, my mother made cupcakes and I took the opportunity to take pictures of them and some of the sprinkles she had spilled on the counter. As usual, I took many similar shots (see my earlier blog post on this topic) to ensure that I got a shot I liked. Here are three unedited shots of sprinkles that I took:
Now, a lot of people would keep all three of these and add them back to back to an email or online album. Understandably, this gets really old, really fast. Who really needs to see three nearly identical close-up shots of sprinkles? One is plenty. So, I chose my favorite, edited it, and uploaded that shot to my various online albums. Now, I can delete the others and de-clutter my iPhoto album as well as free up memory on my laptop.
To put an end to this little rant, please do not bore your friends and family with repetitive photos. You're much better off with a 15-photo album with unique, well-taken pictures than 300-photo album that looks like the world's worst flip book.
Saturday, March 26, 2011
Thursday, March 17, 2011
Be Random
However, there are tricks to this kind of photography. If you take a picture of a Diet Coke can, it could end up being remarkable or remarkably dull depending on your technique. You have to put some thought into the angle and staging of your photograph in order to make the photo intriguing. I can't really give a step-by-step lesson for this type of photography because it varies so much depending on the subject of the photograph, but my main advice is simply to think outside the box.
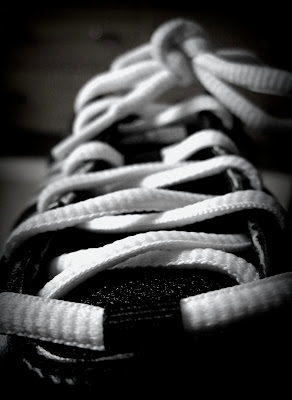
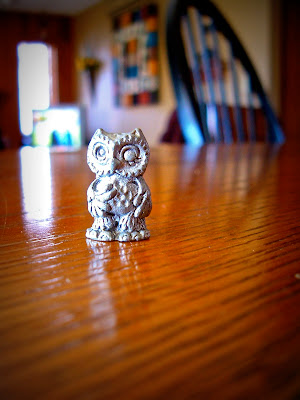
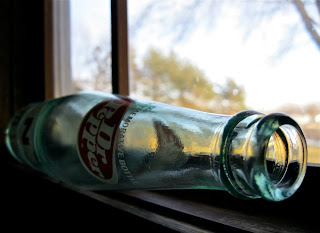
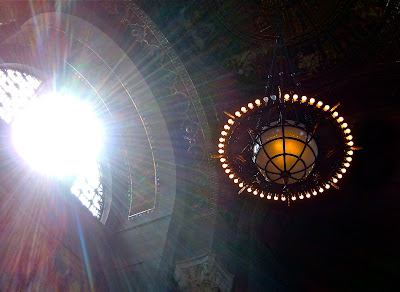
Here are a few examples of random photos that I have taken. Many of these were taken either when I couldn't find anything particularly inspiring outside or when I was in an especially creative mood. Again, these are just a few examples of the millions of possibilities for random photography.
 |
| I got bored in my dorm room, so I took a picture of my tennis shoes. |
 |
| My mom's old Chi Omega figurine from when she was in college. |
 |
| An old Dr. Pepper bottle from the 1970's. |
 |
| A light fixture and window at the Nebraska State Capitol Building. |
It occurs to me that most of my examples are pictures of inanimate objects, but that's not what it has to be. It's difficult to define "random" photographs for obvious reasons. I guess "creative" or "artistic" photography might be a better word. In other words, be random, be creative, and be artistic when taking photographs. Sometimes we all need a break from the same old flower and landscape pictures.
Wednesday, March 9, 2011
Sunsets
All of us, at some point, have seen a sky so spectacular that we scramble try to capture it in a photo. Most of the time, a beautiful sunset photo isn't something that you can generally plan out--it sort of just happens. However, there are a few ways that I have found to predict which nights are likely to produce an impressive sunset to photograph. I also have a few tips (though I am still learning myself) on how to photograph sunsets.
The main way to predict beautiful sunsets is simply to look at the sky. If the sky is completely clear or completely cloudy, put the camera away--you aren't going to get any decent shots. I've found that partly cloudy skies (even if the clouds are "barely there") wispy clouds, are the best for sunsets. You still need some sky showing (obviously) so you can see the sun or sun rays, and you need clouds to reflect the light and create color.
As you're photographing a sunset, if possible, stay outside until the sun is completely gone and all of the color has faded from the sky. In my experience, an A+ sunset often turns into an A+++ sunset if you have a little patience.
As you can see, if you stick around awhile, the colors and clouds can change a lot in the space of only 20 minutes or so. Sticking around and taking many shots of the same sunset can give you more photos to choose from later.
Another thing I would recommend is trying different angles with sunset photos. The examples above feature the sun in the center of the photograph, but that isn't how the picture has to be structured. Try placing the sun off center or don't include it at all. You can get awesome pictures of clouds as the sun is setting and the sun itself isn't necessary to make the photo work. A few examples of what I am talking about are shown below:
Finally, I'm still figuring out exact camera settings myself, so I can't give much advice in that respect. The only obvious advice I can give is to NOT use flash. It's an outdoor photo, and it would just look strange if you tried. When in doubt, try Auto.
To summarize:
1) Look for partly cloudy skies or skies with some kind of detail (even trails from jumbo jets can work) when trying to predict if a night will yield a good sunset.
2) Take multiple pictures over time of the same sunset for variety.
3) Experiment with angles and sun placement.
4) DON'T use flash.
I'm assuming that a lot of this also applies to sunrises. I'm not going to lie, I'm rarely up to see a sunrise, so I have no photos of that particular phenomenon. :)
The main way to predict beautiful sunsets is simply to look at the sky. If the sky is completely clear or completely cloudy, put the camera away--you aren't going to get any decent shots. I've found that partly cloudy skies (even if the clouds are "barely there") wispy clouds, are the best for sunsets. You still need some sky showing (obviously) so you can see the sun or sun rays, and you need clouds to reflect the light and create color.
As you're photographing a sunset, if possible, stay outside until the sun is completely gone and all of the color has faded from the sky. In my experience, an A+ sunset often turns into an A+++ sunset if you have a little patience.
As you can see, if you stick around awhile, the colors and clouds can change a lot in the space of only 20 minutes or so. Sticking around and taking many shots of the same sunset can give you more photos to choose from later.
Another thing I would recommend is trying different angles with sunset photos. The examples above feature the sun in the center of the photograph, but that isn't how the picture has to be structured. Try placing the sun off center or don't include it at all. You can get awesome pictures of clouds as the sun is setting and the sun itself isn't necessary to make the photo work. A few examples of what I am talking about are shown below:
 |
| There's no sun in this shot, but it still works. The trees, flags, and cloud color are more than enough to make up for its absence. |
 |
| The sun is in this shot, but as you can see I placed it to the left in the photo. In case you're wondering, I did apply an effect to this particular photo to bring out the colors even more. |
Finally, I'm still figuring out exact camera settings myself, so I can't give much advice in that respect. The only obvious advice I can give is to NOT use flash. It's an outdoor photo, and it would just look strange if you tried. When in doubt, try Auto.
To summarize:
1) Look for partly cloudy skies or skies with some kind of detail (even trails from jumbo jets can work) when trying to predict if a night will yield a good sunset.
2) Take multiple pictures over time of the same sunset for variety.
3) Experiment with angles and sun placement.
4) DON'T use flash.
I'm assuming that a lot of this also applies to sunrises. I'm not going to lie, I'm rarely up to see a sunrise, so I have no photos of that particular phenomenon. :)
Friday, March 4, 2011
The "Flower" Button
I want to dedicate this post to the mysterious "flower" button that appears on most digital cameras. This button actually turns on the macro setting, which is used for close-up photography. It is extremely useful when photographing something small because it provides better clarity and detail. As I mentioned in the previous post, it also gives you that nice blur in the background. Some of you may have used the macro setting without even realizing it. Many cameras, like my newer one, will automatically kick on the macro setting when the camera is trying to focus on an object near the lens (when on Auto). If your camera is older or if you aren't using Auto, you might have to turn it on manually by pushing the flower button.
Personally, I really enjoy using this setting. It's the only special camera setting that I use frequently, and I think it really improves the look of my photos. Here are a few of my photos that involved the use of the macro button.
Personally, I really enjoy using this setting. It's the only special camera setting that I use frequently, and I think it really improves the look of my photos. Here are a few of my photos that involved the use of the macro button.
Just to put things into perspective, the subjects of each of these photographs are NOT large items. The owl in the last photograph is probably an inch tall or smaller. Macro is an interesting way to blow up a small object to a much larger size. When I take pictures of some of these small trinkets, leaves, flowers, etc. I don't even notice certain details until I upload the photos and can see the object at 10 times its size on my computer screen.
As I said before, if you have never used macro, it is definitely something that you will want to try. Here is a picture of the button you're looking for in case you're confused (the location of the button will vary depending on the brand and model of camera):
Subscribe to:
Posts (Atom)


