Wednesday, April 13, 2011

Don't Be Afraid to Look Stupid

This blog post has a simple enough message: Don't be afraid to look a little silly (and possibly crazy) when trying to get a good shot.  I guarantee many great photos you have seen were not taken by someone standing straight up and holding the camera out in typical fashion.  There is a strong possibility that the photographer was lying flat on their back, on their stomach, crouching, twisting, reaching, or climbing when they took the photo.

I'm not trying to say that you can't take a good photograph in a normal position, but many times you can achieve a much more interesting angle using strange body positions.  You might look a little odd to passersby, but who really cares?  If you get the awesome shot you were seeking, it's worth it to appear a tad eccentric.

Here are a couple examples of my own work that I took in rather odd positions.  Most of these involved sitting, kneeling, or laying down.

I know for a fact that I was sitting in dirt for this shot.  Hopefully, not in white shorts.
I chased this squirrel 50 yards across a construction zone for this picture.  Talk about difficult...  I think he knows what a camera is and was trying to hide from the paparazzi.  He's the only black squirrel I've ever seen on campus, and people are always whipping out cameras to take pics of him.
I got the strangest look from a guy who was walking by as I took this photo.  He was probably wondering why I had my camera in an ashtray.

Once again, I encourage you to get creative with your body positions as well as your angles.  I think you'll find that you get more interesting shots that way.  However, I do want to make something clear.  I believe that you should not be afraid to LOOK stupid, not that you should go out and DO something stupid.  Standing perilously close to a cliff edge or a dangerous wild animal may not be worth the spectacular shot if you sustain serious bodily injury.  If you're willing to take the risk, that's great, but don't blame me if something goes terribly wrong!

To finish out this post, I want to share a few pictures I found of photographers on Flickr.  None of these pictures are mine, but I thought they would illustrate my main point quite nicely.  Take a leaf out of these people's books:

Depending on whether or not this guy can swim, this might an example of a risky photography position.
Clearly, this woman is not afraid to look insane.
Nice flexiblity.  She clearly stretches before a photo shoot...

Friday, April 8, 2011

Senior Picture Money Savers

In a few short weeks, there will be high school seniors graduating all over the country.  Along with graduation come senior photos, which are often taken professionally at a hefty price.  Some photographers are cheaper than others, but either way you'll be forking out a decent amount of cash.  I've known people that have spent hundreds (if not close to $1,000) on senior photos.  However, thanks to an idea my family got from one of my friends, we paid $0 for my brother and me to have our senior pictures taken (and only a small amount for them to be printed).

How was this possible?  The answer is simple: we took the pictures.  My mom was responsible for my pictures, and my brother's pictures were a combination of work by me, my younger sister, and my mom.  We took the pictures outdoors in our backyard, at parks, golf courses, etc. with our own digital cameras, uploaded the pictures, and edited them on Picnik.  To print the photos, we simply sent the photos to get printed at Walmart's photo center (these prints are very reasonable priced) and picked them up later.  

In other words, the pictures could be taken on our time, in a location we chose, and could be uploaded/printed as quickly as we wanted.  My mom would be better equipped to provide more detailed information on the exact cost of printing at Walmart, but I know it's not very much.   All in all, this is a great way to cut hundreds of dollars from the senior year budget.  I've included a couple examples of my brother's senior photos below.

This photo was taken in our backyard and edited by my mother.
This one was taken by me in a local park, and later edited on Picnik. 
Finally, this shot was taken by my younger sister (a freshman in high school) and later edited by me in Picnik.

You can also cut corners on graduation invitations, converting one of the pictures into a party invite. Below is a mock graduation invitation made from one of the senior pictures my mother took.  All of the editing and text was added in Picnik.


I'm not good with invitations, so the words I chose are a bit lame, but you get the idea.  Just like the regular senior photos, invitations can also be printed off at a local Walmart or Walgreens for a low price. 

Overall, I think taking your own senior photos is an ingenious way to save money.  The hundreds of dollars that you would have spend on photos can be put towards something else like college, textbooks, or other post-high school expenses.  One last thing I would like to point out, though, is that this method is not the best for studio portraits.  My family prefers outdoor shots, so this was not a problem.  However, you can still save money and get studio headshots.  My suggestion is to take your outdoor photos yourself and get a one or two studio shots at a professional.  It may not be as cheap, but it's not as expensive as getting ALL of your photos taken professionally.  

Friday, April 1, 2011

Taking a Picture of a Picture

If you're a member of the "older" crowd that was born in the era before digital cameras were common, you probably possess a large number of real, physical photos.  Most of my childhood photos (except high school and beyond) were taken with film cameras, so there are literally hundreds of hardcopies of photos in boxes in our basement.  Although I appreciate "real" photos, the fact that they are printed on paper is often inconvenient if you want to share them online, put them in a slideshow, or use them in some other project.  This is an easy fix for those who own a photo scanner, but is a bigger problem for those who do not.  In this post I will provide a simple way to digitize images for people who, like me, are too cheap to buy a scanner.

This solution is laid out pretty well in the post title: take a picture of a picture.  When you're in a pinch and don't have access to a scanner, you can use your digital camera to snap a picture of the picture you want to put on the computer.  Through trial and error, I've found that the best way to do this is to follow these steps:

1) Find a room that has a lot of natural light if taking the picture during the day.  If it is dark outside, find a room with a bright overhead light or lamp.

2) Lay the picture flat on a tabletop in a way that there is not too much glare on an important part of the photo from either sunlight or a light fixture.

3) Aim your camera directly above the picture.  Make sure your flash is OFF!  All it will do is create a massive bright spot in the middle of your photo, especially if the photo finish is glossy.  Using the macro setting might be a good idea for greater detail, as well.

4) Try to keep the camera as steady as possible.  I often use my elbows for stability when taking the picture.  Those of you who have a tripod will probably find it immensely helpful if you can get it positioned correctly.  

5) Take the picture.  Take a few different shots in case you moved too much and ruined the picture.  Just because the picture looks clear on the LCD screen, it doesn't mean that it won't be blurry when you upload the picture.

6) Upload and edit.

The first few times I did this, the results were not always spectacular.  However, now I feel like a combination of practice, using the correct settings, and mastering the art of holding the camera perfectly still makes my pictures of pictures look a lot more like something that was scanned onto the computer. In fact, many of the photos that my family and I have converted to digital in this way actually look better than they did originally. Here are a few examples of pictures of pictures taken by my mom, sister, and me:


As someone who knows what the originals look like, I can tell you that these look pretty much identical.  This technique is definitely not as consistent because the lighting/glare and how steady you hold the camera can affect outcome of the photo.  However, I think the benefits outweigh the costs in this situation.  This is a great cheat for those of us that don't want to pony up the cash for a scanner, and I strongly suggest giving it a shot!

Saturday, March 26, 2011

Quality Over Quantity

I can't tell you how many times I have flipped through photos on Facebook, Flickr, or an email and been annoyed by the sheer volume of photos.  It's one thing if you have 200 photos that are equally fascinating and totally different from one another, but that's rarely the case.  There is nothing more boring than looking at a Facebook photo album that has 50 photos in a row that look almost exactly the same.  As dull as albums like this are, they are shockingly common on the web, which is why I'm dedicating a post to this topic.

The bottom line is: KNOW WHEN TO DELETE.  If you take 10 photos of the same thing, even if they are all good, you either need to:

a) Pick a couple favorites and delete the rest.  It will save you computer memory space.

OR

b) If you really can't let go of the photos forever, pick a couple favorites to upload and leave the rest on your computer.

I'm guilty of doing this myself.  There have been times when I've uploaded similar photos and created some redundancy on my Facebook or Flickr accounts.  However, I periodically go back and weed the not-so-spectacular photos from both my online albums and iPhoto on my computer.  If you go back later you often find yourself much less attached to photos you couldn't let go of weeks or months ago.

As an example, I will use some pictures that I took yesterday to demonstrate how to choose.  Yesterday afternoon, my mother made cupcakes and I took the opportunity to take pictures of them and some of the sprinkles she had spilled on the counter.  As usual, I took many similar shots (see my earlier blog post on this topic) to ensure that I got a shot I liked.  Here are three unedited shots of sprinkles that I took:


Now, a lot of people would keep all three of these and add them back to back to an email or online album.  Understandably, this gets really old, really fast.  Who really needs to see three nearly identical close-up shots of sprinkles?  One is plenty.  So, I chose my favorite, edited it, and uploaded that shot to my various online albums.  Now, I can delete the others and de-clutter my iPhoto album as well as free up memory on my laptop.


To put an end to this little rant, please do not bore your friends and family with repetitive photos.  You're much better off with a 15-photo album with unique, well-taken pictures than 300-photo album that looks like the world's worst flip book.

Thursday, March 17, 2011

Be Random

One thing I'm learning about photography is that you don't always have to take stereotypical photographs.  You don't need a sunset, a beautiful landscape, a flower, people, or anything else that you would typically see in a photo to take an interesting shot.  If you're bored, try to make something ordinary interesting by photographing it.  Something as simple as a pen on a desktop or the texture of a blanket can be turned into an attractive photograph.  The ability to take a picture of anything at anytime will help you avoid having to wait around for something to inspire you.

However, there are tricks to this kind of photography.  If you take a picture of a Diet Coke can, it could end up being remarkable or remarkably dull depending on your technique.  You have to put some thought into the angle and staging of your photograph in order to make the photo intriguing.  I can't really give a step-by-step lesson for this type of photography because it varies so much depending on the subject of the photograph, but my main advice is simply to think outside the box.

Here are a few examples of random photos that I have taken.  Many of these were taken either when I couldn't find anything particularly inspiring outside or when I was in an especially creative mood.  Again, these are just a few examples of the millions of possibilities for random photography.

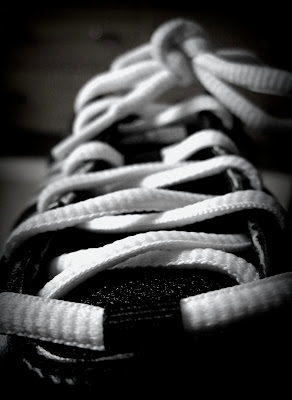
I got bored in my dorm room, so I took a picture of my tennis shoes.
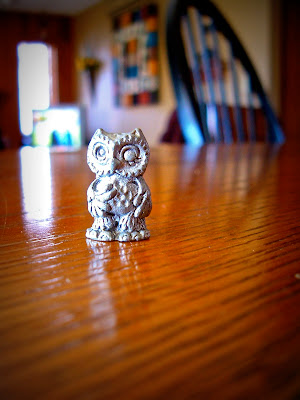
My mom's old Chi Omega figurine from when she was in college.
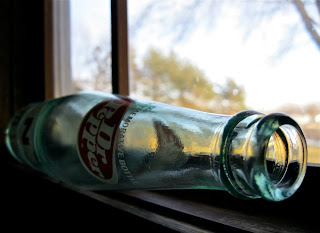
An old Dr. Pepper bottle from the 1970's. 
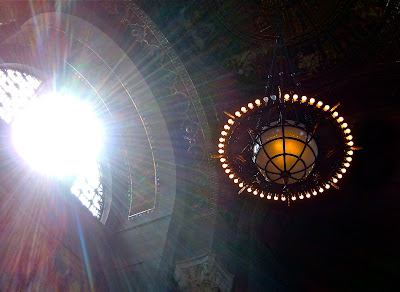
A light fixture and window at the Nebraska State Capitol Building.

It occurs to me that most of my examples are pictures of inanimate objects, but that's not what it has to be.  It's difficult to define "random" photographs for obvious reasons.  I guess "creative" or "artistic" photography might be a better word.   In other words, be random, be creative, and be artistic when taking photographs.  Sometimes we all need a break from the same old flower and landscape pictures.

Wednesday, March 9, 2011

Sunsets

All of us, at some point, have seen a sky so spectacular that we scramble try to capture it in a photo.  Most of the time, a beautiful sunset photo isn't something that you can generally plan out--it sort of just happens.   However, there are a few ways that I have found to predict which nights are likely to produce an impressive sunset to photograph.  I also have a few tips (though I am still learning myself) on how to photograph sunsets.

The main way to predict beautiful sunsets is simply to look at the sky.  If the sky is completely clear or completely cloudy, put the camera away--you aren't going to get any decent shots.  I've found that partly cloudy skies (even if the clouds are "barely there") wispy clouds, are the best for sunsets.  You still need some sky showing (obviously) so you can see the sun or sun rays, and you need clouds to reflect the light and create color.

As you're photographing a sunset, if possible, stay outside until the sun is completely gone and all of the color has faded from the sky.  In my experience, an A+ sunset often turns into an A+++ sunset if you have a little patience.


As you can see, if you stick around awhile, the colors and clouds can change a lot in the space of only 20 minutes or so.  Sticking around and taking many shots of the same sunset can give you more photos to choose from later.

Another thing I would recommend is trying different angles with sunset photos.  The examples above feature the sun in the center of the photograph, but that isn't how the picture  has to be structured.  Try placing the sun off center or don't include it at all.  You can get awesome pictures of clouds as the sun is setting and the sun itself isn't necessary to make the photo work.  A few examples of what I am talking about are shown below:

There's no sun in this shot, but it still works.  The trees, flags, and cloud color are more than enough to make up for its absence.

This photo was taken at ground level and the sun was not visible in this shot because it had already set.  Despite this fact, the clouds still retained their color, and the farmhouse is an interesting detail, so there's no reason the sun has to be in the picture.
The sun is in this shot, but as you can see I placed it to the left in the photo.  In case you're wondering, I did apply an effect to this particular photo to bring out the colors even more.

Finally, I'm still figuring out exact camera settings myself, so I can't give much advice in that respect.  The only obvious advice I can give is to NOT use flash.  It's an outdoor photo, and it would just look strange if you tried.  When in doubt, try Auto.

To summarize:
1) Look for partly cloudy skies or skies with some kind of detail (even trails from jumbo jets can work) when trying to predict if a night will yield a good sunset.
2) Take multiple pictures over time of the same sunset for variety.
3) Experiment with angles and sun placement.
4) DON'T use flash.

I'm assuming that a lot of this also applies to sunrises.  I'm not going to lie, I'm rarely up to see a sunrise, so I have no photos of that particular phenomenon. :)

Friday, March 4, 2011

The "Flower" Button

I want to dedicate this post to the mysterious "flower" button that appears on most digital cameras.  This button actually turns on the macro setting, which is used for close-up photography. It is extremely useful when photographing something small because it provides better clarity and detail.  As I mentioned in the previous post, it also gives you that nice blur in the background.  Some of you may have used the macro setting without even realizing it.  Many cameras, like my newer one, will automatically kick on the macro setting when the camera is trying to focus on an object near the lens (when on Auto).  If your camera is older or if you aren't using Auto, you might have to turn it on manually by pushing the flower button.

Personally, I really enjoy using this setting.  It's the only special camera setting that I use frequently, and I think it really improves the look of my photos.  Here are a few of my photos that involved the use of the macro button.


Just to put things into perspective, the subjects of each of these photographs are NOT large items.  The owl in the last photograph is probably an inch tall or smaller.  Macro is an interesting way to blow up a small object to a much larger size.  When I take pictures of some of these small trinkets, leaves, flowers, etc. I don't even notice certain details until I upload the photos and can see the object at 10 times its size on my computer screen.  

As I said before, if you have never used macro, it is definitely something that you will want to try.  Here is a picture of the button you're looking for in case you're confused (the location of the button will vary depending on the brand and model of camera):